Armatures are inportant iif you want your doll to stand alone. This tutorial shows a simple way to make a wire skeleton for a doll. Use the step by step instructions to shape your own armature.
Wire armature for a doll
| Difficulty | Cost | Time | Age | Person | Event |
|---|---|---|---|---|---|
|
Easy
|
$1 to $25
|
30 Minutes
|
-- | -- | -- |
You Will Need...
- Floral wire
Step by Step Instructions
Step 1
A simple armature for a doll
These instructions give directions for a basic armature that can be used for cloth dolls, needle felting, paverpol and polymer clay.
Supplies
Floral wire, 16 or 18 gauge, preferably cotton covered
Floral tape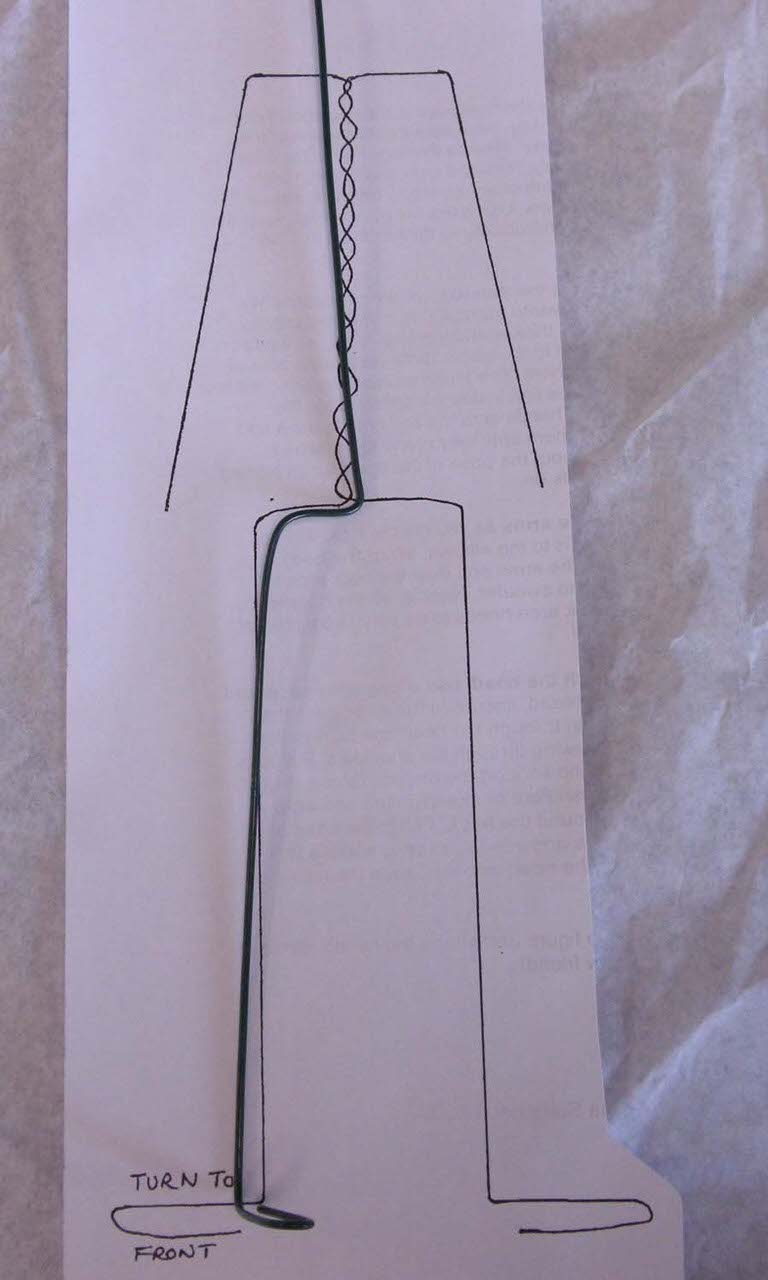
Step 2
Armature
Draw a diagram of the doll, the actual size you want the doll to be. Dont forget that the stuffing will make the doll bigger.
Take a look at the diagram for the proportions of the wire. Floral wire stems are about 18 long. You will need two.
Start at the feet and make a loop in the wire for the foot, according to the diagram. Now bend it at a 90 degree angle, to become a foot.

Step 3
Measure the leg to the hip and bend the angle to form the hip. The feet must point forward, remember! Now make a second leg to match, with the other wire, bending the hip the opposite way.

Step 4
Put the two hips together and twist the two wires a few times to form the spine. Stop at the shoulder length on the diagram. Bend out the shoulders and bend again for the arms. Dont worry if the arms are long, well cut these later.

Step 5
Cut a piece of wire about 3 long and twist it around the top of the spine to form a neck bone. You need about 1 ¼ above the shoulders. Secure with a strip of stretched floral tape.

Step 6
If the wire is cotton covered, youre done! The wrapping will cling to the cotton covering of the wire. If the wire is slippery, wrap the whole armature with stretched floral tape.
Hands and head can be attached to the wires once youve got the body covered and shaped into a doll.

Gallery


Leave a Reply