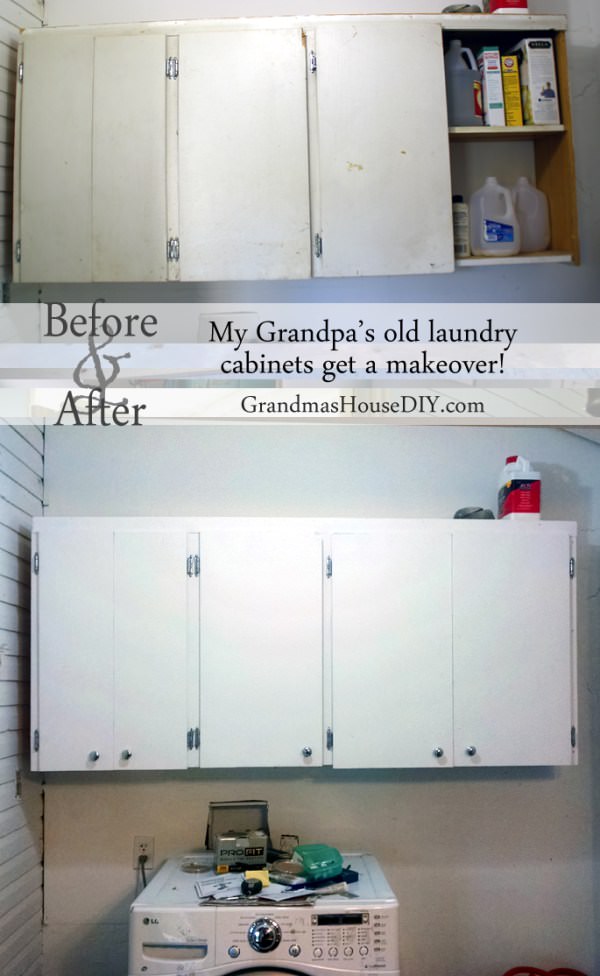
Ok, so this isn’t much of a before and after and its certainly not a tutorial. However, I’m going to share this with you anyway because I’m SO excited to finally get storage up in our laundry room/closet and, finally, paint on this old cabinet! Here is the old cabinet my grandpa built before we started renovating the house. To see the full on before and after of our entry click here.
AN old cabinet gets a new coat of paint and new hardware!
| Difficulty | Cost | Time | Age | Person | Event |
|---|---|---|---|---|---|
|
Easy
|
$0 or Free
|
30 Minutes
|
-- | -- | -- |
Inspired From:
You Will Need...
- We did all we could to salvage as much from the house as we could but there was not really a single cabinet that we took out of the house that didn’t suffer at least a little collateral damage. These have been waiting over a year to get installed above our own washer/dryer for storage. Once we got them installed we were both ecstatic, no more bins in the laundry closet, no more stuff covering every surface (well, almost) now we had real storage! This old cabinet literally holds everything we need in our laundry room which is: Towel storage, cleaning supplies, randomness storage and all of our laundry detergent.
Step by Step Instructions
Step 1
As you can see the old cabinet got beat up quite a bit. They were dirty with wood showing and one of the doors was still out in the garage when we installed them. What I SHOULD have done was take the doors off in my workshop, adjust everything (cause the whole cabinet got pretty wonky when we ripped it off the wall) and paint them inside and out. However, we needed storage so BADLY and I was racing the weather (paint doesn’t do well when its below freezing) so I opted to get them installed and paint them later.


Leave a Reply