This project is so incredibly simple to create and costs less than $15 to boot! With some scrapbook supplies laying around the house and a picture frame, you can create an eye catching piece of custom artwork that fits your family!
Create Your Own Framed Artwork: a simple and frugal tutorial
| Difficulty | Cost | Time | Age | Person | Event |
|---|---|---|---|---|---|
|
Easy
|
$1 to $25
|
30 Minutes
|
-- | -- | -- |
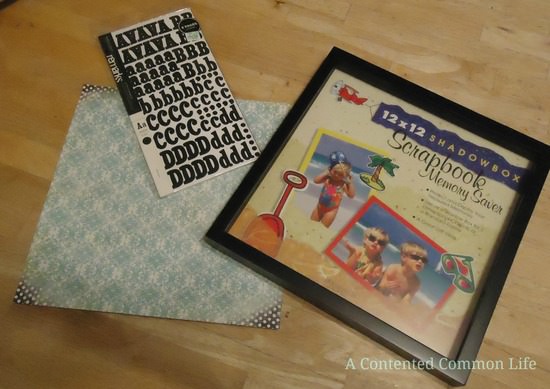
You Will Need...
- scrapbook paper
- alphabet stickers
- picture frame
Step by Step Instructions
Step 1
First things first- I checked to make sure my scrapbook paper was true to size and actually fit inside the frame. It did.
Step 2
On to step two: Adding your saying.
I knew exactly what I wanted it to say as I’ve loved this song for always…You choose your own saying, phrase, verse, scripture… whatever fits you best!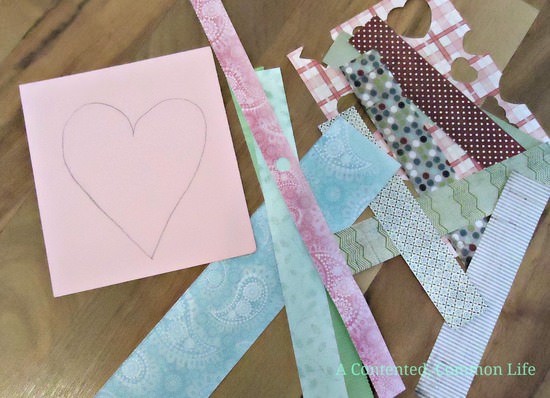
Step 3
I penciled out how I wanted the verse/saying to be broken up and began putting the stickers on. I didn’t want it straight, I purposed to put the stickers on at angles and such. I believe it adds character. I also chose to use all lowercase for everything but THEE, for which I chose all caps.
Step 4
There was a nice piece of pink cardstock in our stash so I started with that. I knew my heart had to be “off kilter” like the placement of my stickers, so I quick drew it on with pencil.

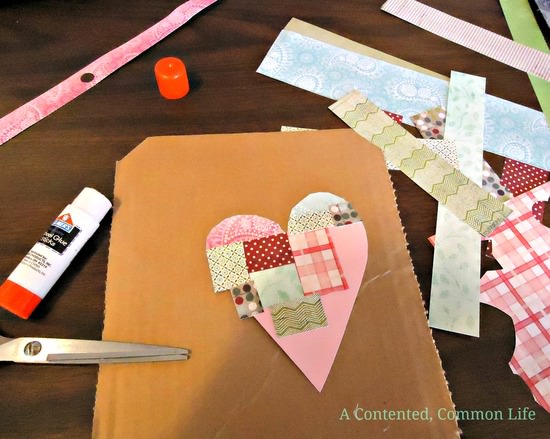
Step 5
I glued the paper pieces on the heart and then flipped it over (in order to see the heart-shaped cardstock) and neatly trimmed the pieces that overlapped the heart, using the cardstock as my guide.

Step 6
After I finished it the heart I felt it looked too crisp and clean for my background, so I pulled out abrown ink stamp pad and a piece of sponge. Next, sponged the edges of the heart, then I took the sponge, lightly dabbed in the brown ink, and smudged it over the whole top of the heart.
I love the “old well-loved quilt” look of this heart.
Gallery


Leave a Reply