Turn a simple boring frame into a cute and easy children’s photo personalized artwork holder. I made it to display my sons artwork in their playroom. I want them feel proud of their own work. Its a very easy and affordable project. Most likely, you have all materials at home. This project can be created any theme and colors.
DIY Easy and Inexpensive Artwork Holder
Inspired From:
Step by Step Instructions
Step 1
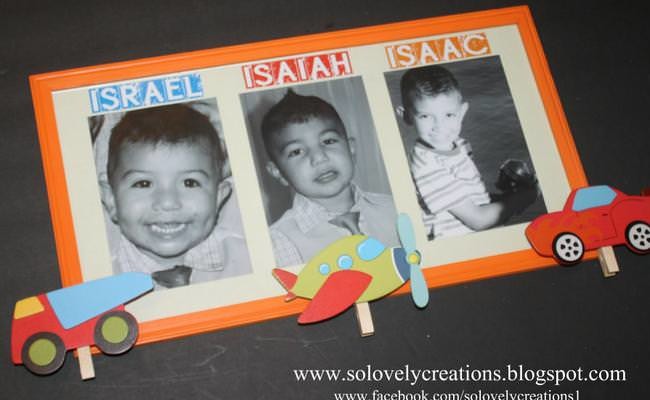
Take frame apart and paint frame in any color you’d like. I used orange so it can stand out on the wall. I also used gloss paint for a shiny finish.

Step 2
Print photos using any office program on your computer. The frame I used had 3 5 X 7 openings for pictures. I decided to print photos in black and white since I was using a lot of color in other areas.For the names, I typed them using an office program and glued them to the mat using a glue stick.

Step 3
I glued pictures down on paper and put the frame together.

Step 4
I purchased 3 decorative wooden pieces at a craft store. Using a glue gun, glue clothespin to each wooden piece. Let dry.

Step 5
Once it dries, adhere each piece to the front of the frame. I glued outside pieces at the very end so their artwork wouldn’t overlap.

Step 6
Love it!

Gallery


Leave a Reply