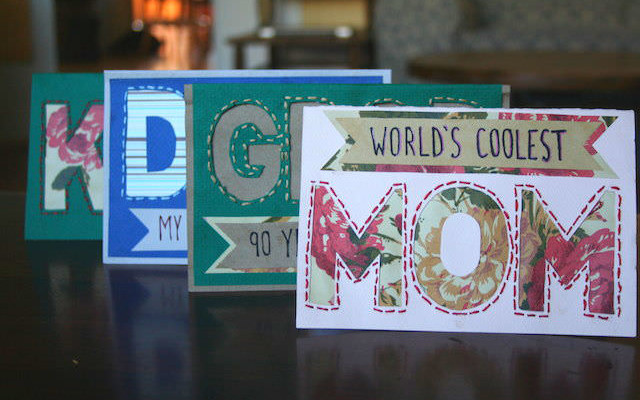
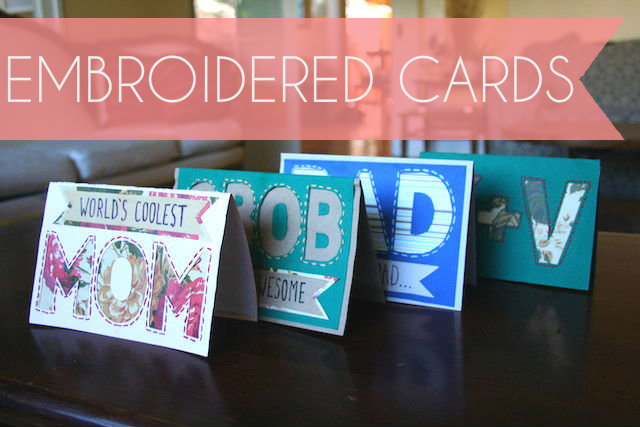
A tutorial for DIY embroidered cards, just in time for Mother’s Day! These hand-stitched, hand-cut cards are more thoughtful than printables and just as professional as store-bought cards. And yet, they can still be made with ease, even by the novice crafter. Ready to get your craft on? Grab your basic crafting kit: paper, glue, scissors, paper, needle, and thread. That’s all you need!
DIY Embroidered Cards
Inspired From:
You Will Need...
- cardstock (or other thick paper)
- something to "peek through" the letters (scrapbook paper, wrapping paper, fabric, wallpaper, colored cardstock, construction paper, tissue paper, etc.)
- scissors (or exacto knife and cutting board)
- tape & glue
- embroidery floss & embroidery needle
- optional: printer (you could also hand-draw your letters)
Step by Step Instructions
Step 1
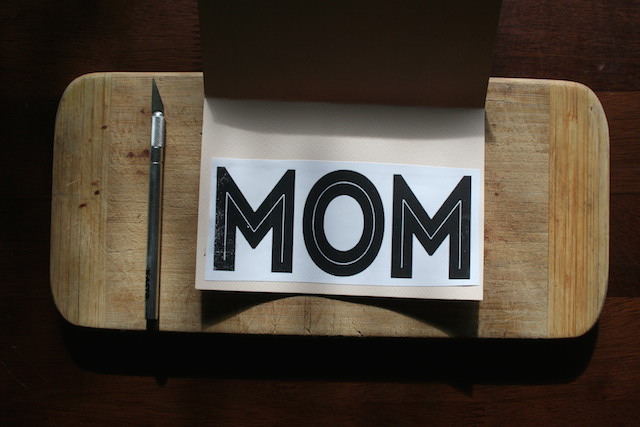
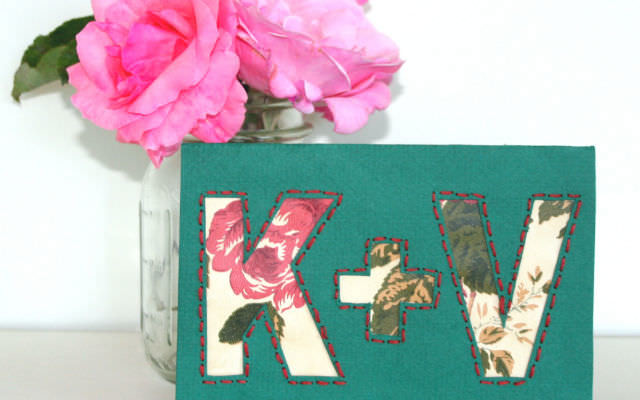
Design the word you want to use for your cover. For the most of the cards, I used a font called Intro Inline. (You can download that font for free at Font Fabric.) The one exception was the card that says “K+V”; for that one, I used Arial Black.
I took a screen shot of each word, and used the .JPG images to maximize my control over each word’s height and width. After you’ve got the sizing just right, you’ll need to get a mirror image of the word. You can do this either in Photoshop (or Photoshop’s free on-line equivalent, Pixlr Editor), or by simply clicking “flip horizontally” in your printer settings. Since MOM is a palindrome, there was no need to mirror it for this card!
Step 2
Glue the word to the back of the card’s cover such that the top of the word is closest to the folded edge. Wait for the glue to dry (or better yet, use glue stick).

Step 3
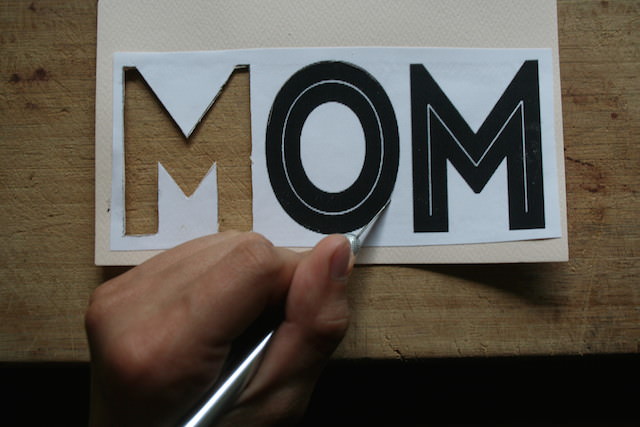
Use your scissors or your exacto knife to cut out the outline of each letter. Be sure to set aside the inside bits of letters like O, A, and B. You’ll need them later!
Step 4
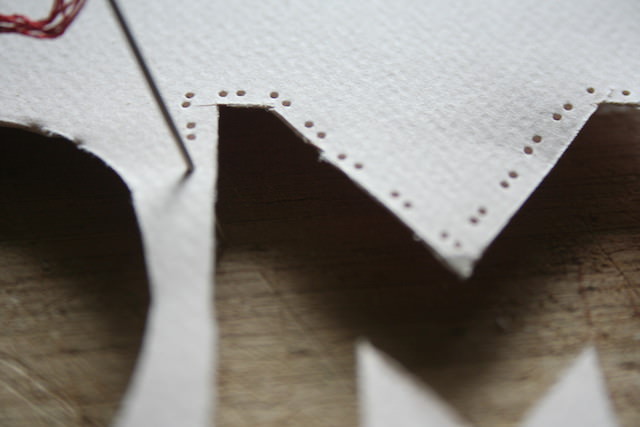
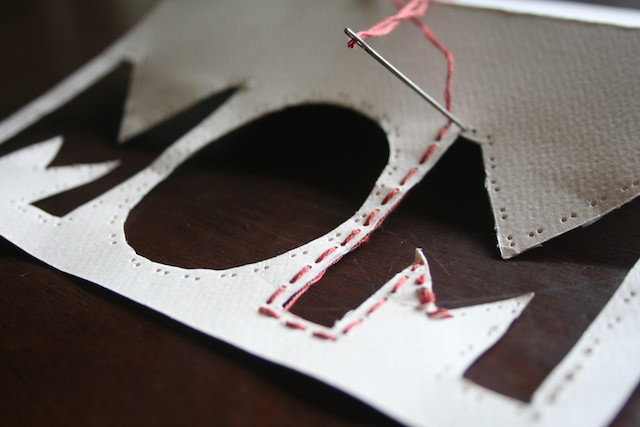
Turn the card over so that you’re looking at the front cover. Use your embroidery needle to poke holes along the edges of each letter. I poked holes in clusters of two, so that the visible stitch would be longer than the stitch on the back of the cover. Avoid poking holes too close to the edge of the letter, as these may break through and render your hole useless. Poking holes is the most time-consuming bit, but you’re almost there!
Step 5
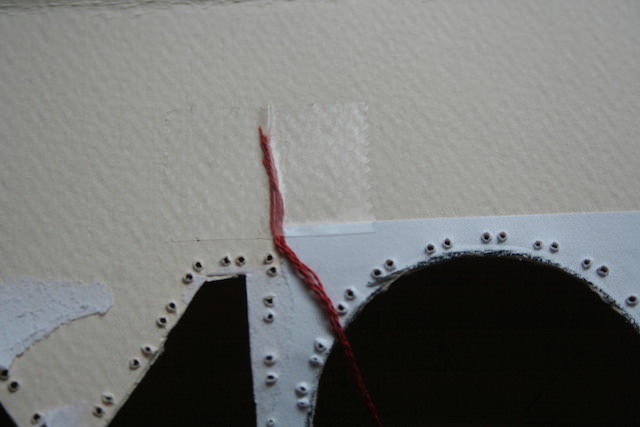
Thread three strands of embroidery floss through your embroidery needle. Tape the end of the floss to the back of the cover. Since you’re embroidering on paper instead of fabric, your usual knot likely won’t hold!
Step 6
Embroider along the edges of the letter using the holes you just poked.
Step 7
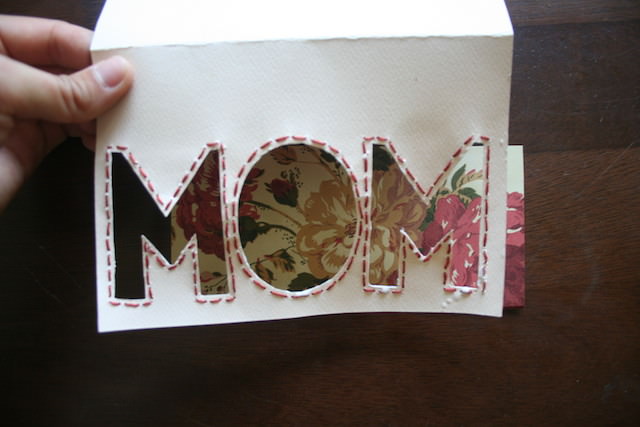
Last but not least, glue your “peek through” paper onto the back of the card cover, facing up through your letters. For my card, I used a wallpaper sample from Home Depot, but you could use just about anything flat and visually interesting! Glue down the inside bits of letters like O, A, and B in the appropriate spots on your “peek through” paper.
Step 8
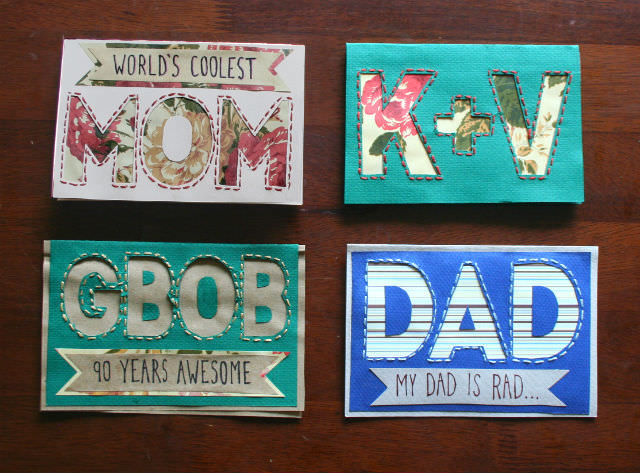
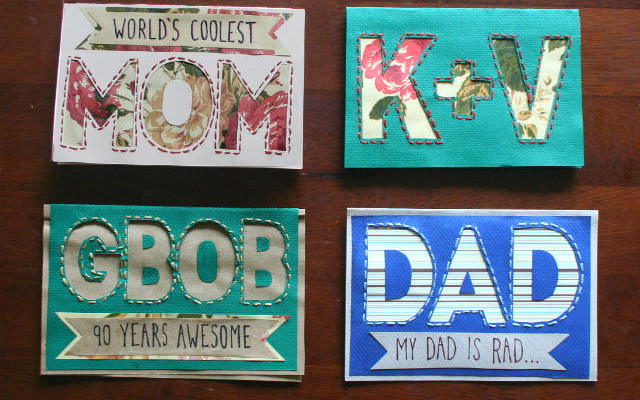
Depending on the back of your “peek through” paper, you may also want to cut and glue a lining for the inside of your card. And that’s it! I liked the first card so much that I made a card for every upcoming occasion: Mother’s Day, Father’s Day, my grandfather’s 90th birthday, and a friend’s wedding!
Gallery

Leave a Reply