Have you ever given some thought to the topic why tiles are one of the most common materials people choose for their homes? Well, my personal opinion is because they are extremely durable and easy to clean. You can’t deny it, cleaning tiles is a lot easier than cleaning a carpet or some rug. But the fact that they can withstand to lots of dirt and pressure doesn’t mean that they are invincible in any way. With time even the strongest tile can get damaged, which can be most often seen on the tile grout. If it’s blackened or stained in any way, the problem can be easily cleaned. But if it’s already cracked, the only thing you can do is to try to repair it somehow. The cracks inside the grout lines of the natural stone tiles can not only be unnoticeable for a long time, but they can also gather moisture and water, which will seep into the cracks and weaken the subsurface of your tiles. Fortunately, the small damage can be easily repaired without the need to remove the old grout. But if there are multiple hairline cracks or some missing grout, you’ll have to seek more professional help.
How to Quickly Repair Cracks in Tile Grout
| Difficulty | Cost | Time | Age | Person | Event |
|---|---|---|---|---|---|
|
Easy
|
$25 to $50
|
1-2 Hours
|
-- | -- | -- |
Inspired From:
You Will Need...
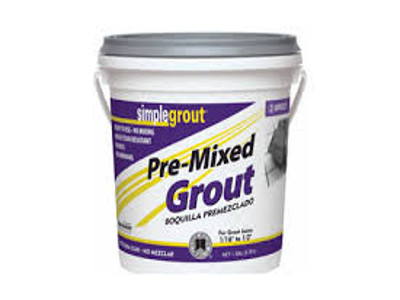
- Pre-mixed non-sanded grout, matching the existing grout.
- Water
- Spray bottle
- Spoon
- Sponge
- Old T-shirt
- Safety gloves
Step by Step Instructions
Step 1
This method will work mostly for smaller cracks, which can be fixed without endangering the entire outlook of the place. So, to begin, you’ll need to get the pre-mixed non-sanded grout you bought, measure about 2 tablespoons of it, and put it in a bowl. Then add a little water to it, to make it a liquid, so it can get inside the cracks more easily. Have in mind that you won’t need big quantities of the grout solution, so you won’t need to buy a big bag of it.
Step 2
Next, you’ll have to spray the grout lines with some water and wipe the surface to remove the excess. This will help you remove all the dirt and dust, which may have settled on the surface, and will allow you to see the cracks more clearly, which will help you apply the correct amount of grout solution.
Step 3
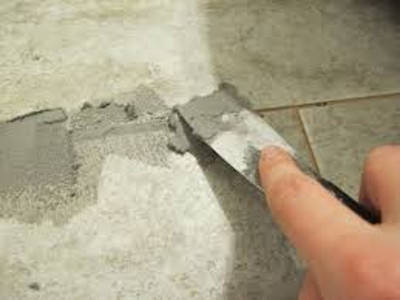
Then pick up the bowl with the thinned grout mix, and drop some of it over the crack gently. You can use the spoon to do that. Aim for the crack, so most of the solution can get inside it, but don’t worry if there are drops all over the tile – this is completely normal and you will easily remove it later. If the grout is not thin enough to get inside the cracks, you should add more water to it, but be careful to not add too much water this time.
Step 4
You’ll have to push the grout inside the hairline cracks, in order to make sure it’s filling the entire space inside. You can do that using your finger. Just make sure to wear your rubber gloves before that, because the grout solution can harm your fingers. When all the cracks are completely filled, you should get the sponge and clean the tiles thoroughly from the excess grout, so it won’t leave marks on the tiles. Then leave it to dry for a while.
Step 5
Once the new grout has dried completely, you should take a closer look at all the cracks. It’s possible that the new grout has shrunk a little while drying, and you’ll have to repeat the whole process from the beginning, until the cracks become completely invisible. The new grout should dry for at least 48 hours.

Step 6
The last thing you’ll have to do in order to bring the shine to your tiles, is to polish them using the old T-shirt. This will help you remove all the leftover grout haze and will buff the tiles.


Leave a Reply