This is a really cheap and easy way to make a fun and original play shop for your little one. A great tutorial to use dated or extra furniture.
Kids Shop Tutorial {repurposed furniture}
| Difficulty | Cost | Time | Age | Person | Event |
|---|---|---|---|---|---|
|
Easy
|
$1 to $25
|
Full Day
|
25-50
|
Anyone
|
Activity or Game
Decorate Homemade Gift |
Inspired From:
You Will Need...
- a set of shelves,
- sand paper
- sanding block (optional)
- primer
- paint - your choice of color
- paint brush
- 2 meters of ribbon
- selection of fabric
- PVA glue
- mini glue dots
Step by Step Instructions
Step 1
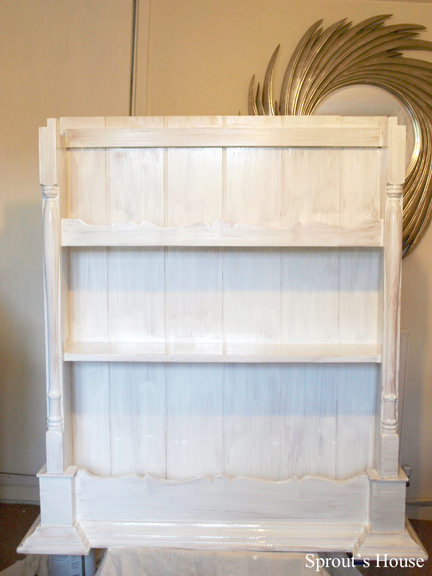
Sand the shelves and paint with primer. Allow to dry as per the instructions.
Step 2
Paint the shelves the color of your choice at least twice to build up a good depth of color.

Step 3
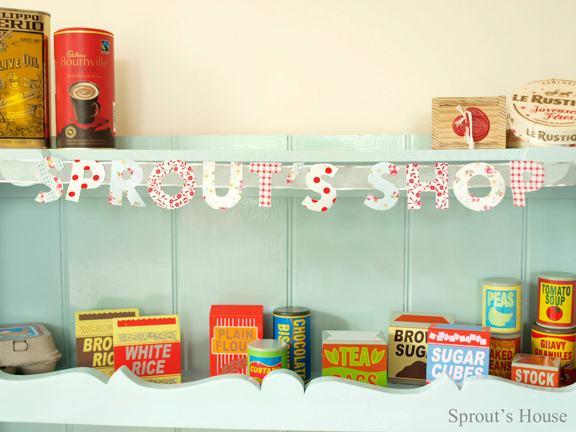
To make the banner – type your letters into Word, choose a font and enlarge to the size you want. Print out the letters and cut them out. Place each letter back to front on the fabric and trace around it. Cut out the fabric letters and glue to the center of the ribbon. Attach the ribbon to the top of the shelves using the mini glue dots.
Step 4
Arrange your shop good and open for business!
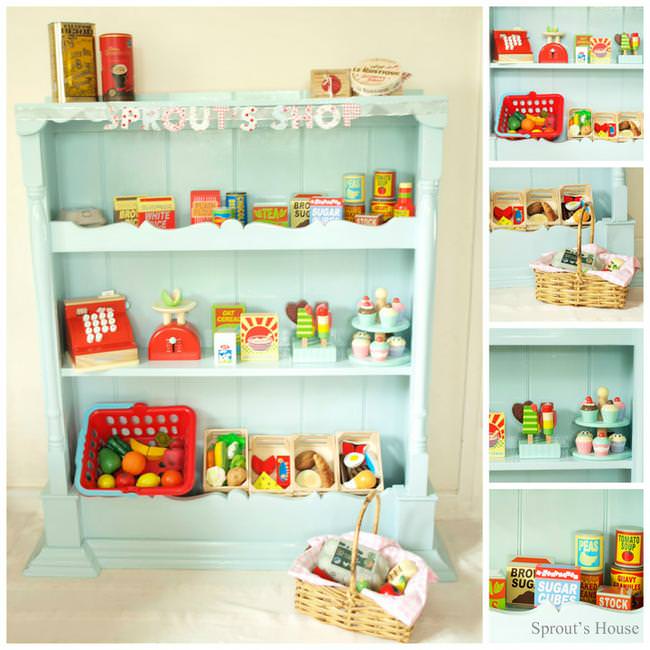
Gallery


Leave a Reply