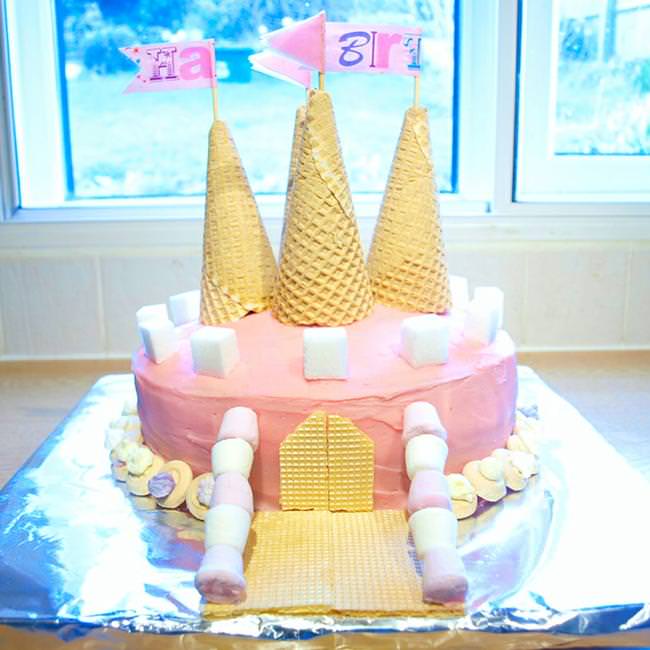
Does your little one love princesses, pink and anything girly? If so, this Princess Cake will be perfect for you!
Princess Cake Tutoria
| Difficulty | Cost | Time | Age | Person | Event |
|---|---|---|---|---|---|
|
Easy
|
$25 to $50
|
4 Hours
|
-- | -- | -- |
Inspired From:
You Will Need...
- Ingredients:
- 200g caster sugar
- 200g softened butter
- 200g self-raising flour
- 4 eggs beaten
- 1tsp baking powder
- 2tbsp milk
- 2x 20 cm sandwich tins
- baking paper
- Vanilla Icing:
- 500g icing sugar sifted
- 160g unsalted butter – room temperature
- 50ml whole milk
- a couple of drop of vanilla extract
- pink food colouring - add the colouring as soon as you have made the icing OR use white icing for the filling and the colour the icing for the outside of the cake.
- Filling:
- 340g jar of good quality strawberry jam
- Decorations:
- 4 waffle ice cream cones
- 20 white sugar cubes
- 15 small white and pink mini marshmallows
- 4 ice cream wafers
- 30-40 iced gems
- 6 bamboo skewers
- 1 cake board
- Pink tissue paper
- Happy Birthday wrapping paper or similar
Step by Step Instructions
Step 1
1. Make the cake using the BBC GoodFood Victoria Sandwich recipe and wait for the sponges to cool. Use Hummingbird Bakery recipe to make the vanilla frosting.

Step 2
Assemble the cake – dab a bit of icing in the centre (but slight towards the back of the cake board so that the drawbridge fits in) and place the first sponge cake on top of it. Spread a layer of icing then a layer of jam before adding the second sponge cake. If you haven’t already done so, add a few drops of pink food colouring to the icing.

Step 3
Ice the cake starting with the sides and finishing with the top. You can crumb coat it if you like, but I found that I didn’t really need to.

Step 4
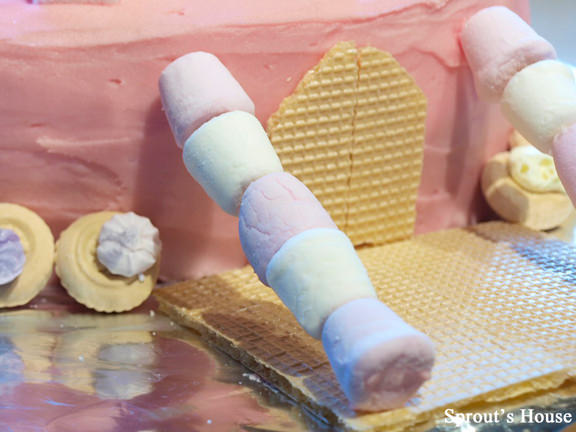
To make the turrets, take each ice cream cone in turn and carefully snip around the top so that the cone will stand up straight when it’s upside down. You may also need to snip a little bit off the tip so that the bamboo skewer will pass through it easily. Arrange the cones upside down on the cake.

Step 5
To make the door, take two of the wafers and gently cut into the shape of a door. Carefully, stick to the side of the cake.
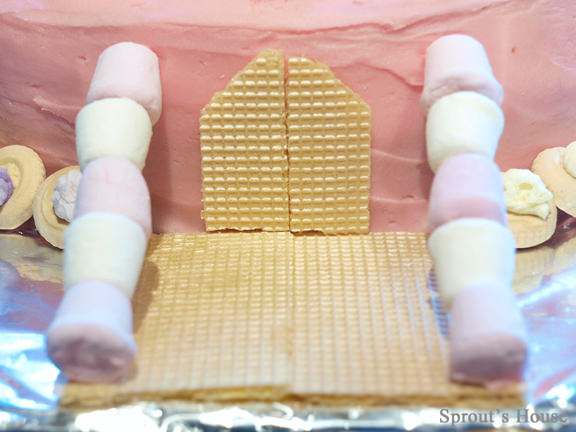
Step 6
To make the drawbridge, take two of the wafers, cut to the correct shape if required and lay on the cake board in front on the door. Secure with a dab of icing.
Step 7
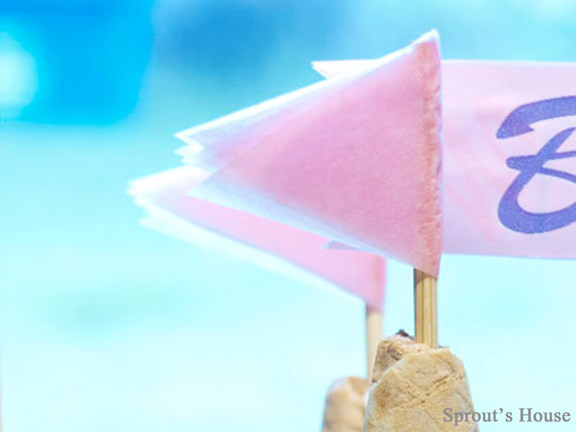
To make the pink flags, cut 8 diamonds out of pink tissue paper. Fold each of the diamonds in half and separate into two piles of four. Wrap one diamond around the end of a skewer and glue in place so that the points match up. Add the other three diamonds one on top of the other, but only glue each one around the skewer so that it looks like the flags are fluttering in the breeze. Repeat with the other pile of diamonds.
Step 8
To make the ‘Happy Birthday’ flags, using some left over wrapping paper and cut out rectangles. (I cut rectangles around the words Happy Birthday). Fold each rectangle in half and wrap around the skewers. Match up the short edges of each rectangle and glue in place. Cut a little triangle in the end of each flag.

Step 9
Add the four flags to the cake, pushing each skewer through the hole in the tip of the cone all the way into the cake.


Leave a Reply