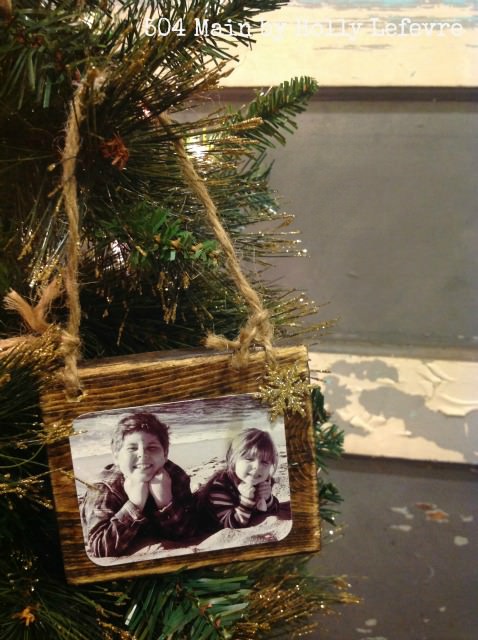
I love decorating my house with memorable items. I also love making ornaments every year. I created these wood scrap photo ornaments to celebrate some of the special moments in our lives. I love see the photos of my “babies” faces adorning the tree. They are really easy to make too!
Wood Scrap Photo Ornaments
| Difficulty | Cost | Time | Age | Person | Event |
|---|---|---|---|---|---|
|
Easy
|
$0 or Free
|
30 Minutes
|
-- | -- | -- |
Inspired From:
You Will Need...
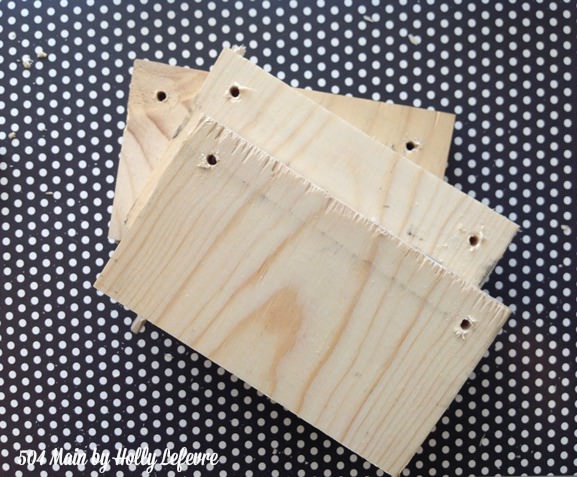
- Scrap wood. I cut 1 x 4 pine boards into 4" lengths.
- Wood stain (or paint) and a brush or rag for applying.
- Drill and bit (for drilling holes for hanger)
- Decoupage (Mod Podge) and brush.
- Photo, Color printer, Photo paper.
- Twine (or ribbon).
- Sand paper.
Step by Step Instructions
Step 1
Cut your wood; Stain the wood; Drill holes in the wood 1/2″ in and 1/2″ down. Sand allover, especially the edges and corners
Step 2
Print out your photos; trim them; round corners if you desire. Then dry position them (without glue) on board.
.JPG)
Step 3
Apply decoupage to the entire piece of wood. Then apply it to the back of the photo. Place the photo on the wood and press down to the edges and all over. I did not put decoupage on top of my photo. You may need to press down the edges again in a few minutes – check them. Let dry.

Step 4
Add a length of twine (or ribbon) through the holes. I go from back to front and then meet on the top of the ornament (It hangs better). Knot three times. Fray the ends for detail.

Step 5
I added a sparkly snowflake embellishment (found n the Christmas section of the craft store). I just simply hot glued it on.

Step 6
These ornaments are so simple to make. Use family photos, kids or grandkids…or even pets! A perfect Thanksgiving week activity ti kick off the Christmas crafting!

Step 7
One more version!


Leave a Reply