I’m so excited to be here sharing my chocolate cake tutorial here on Tip Junkie. Hi, I’m Ashlee from I’m Topsy Turvy and this is a nontraditional wedding chocolate cake recipe with fun chocolate curls.
Laurie is just the most adorable person ever. I was so excited to meet her in real life last summer. And when she said she’d seen my blog!?!? I about died of excitement. And while I’m thrilled to be guest posting for Laurie I’m TOTALLY jealous of the amazing time she and everyone else had at Blissdom last week! It looks amazing, I am putting it on my list for next year.
Chocolate Cake
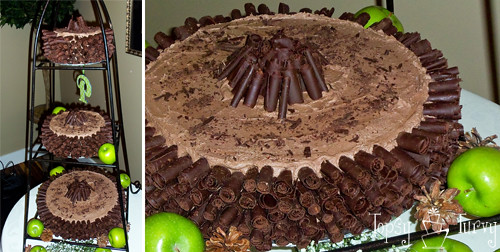
Last week my cousin got married and I offered to make the cake for my gift to them. His bride is a girl after my own heart, Chocolate lover! Everything at the wedding was Chocolate brown and Apple Green. They had a hot chocolate bar, tons of chocolate goodies and my all chocolate cake! It was so much fun to make such a non traditional cake.
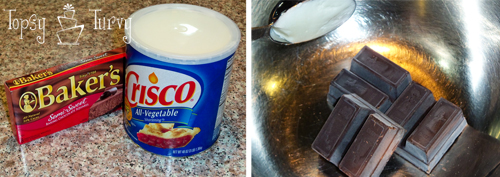
I started the day before by making the chocolate curls. You can do smaller shavings with a peeler and a large bar of Chocolate… But for curls you need softer more flexible chocolate. I used Bakers Semi Sweet baking chocolate. I always use bakers, but I’m sure any baking chocolate would work great. For every 3 oz of chocolate I add 1 Tbsp of shortening. Notice I have a smaller container of Shortening. I use a lot of shortening, but with frosting and baking if the shortening gets even a little old it messes it up. So I always use smaller containers. It’s ends up costing a bit more in the long run, but the quality of always fresh shortening is worth it.
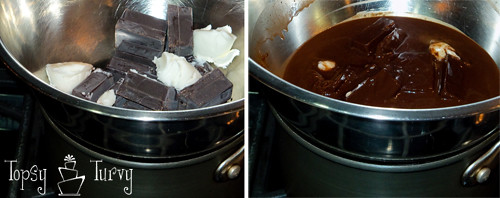
Now we get to melt it together. You CAN use the microwave to melt the chocolate and shortening, but ifor larger batches it’s better to use a double broiler. In fact when it comes to melting chocolate I ALWAYS use a double broiler. Now I don’t have a real, fancy smancy double broiler. I have a metal bowl and a small pot! I boil water in the pot, and set the metal bowl on top! Easy peasy!
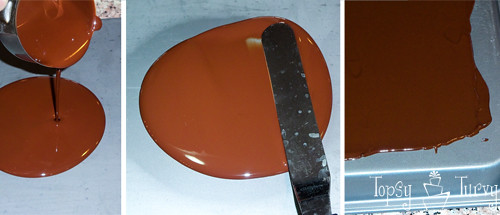
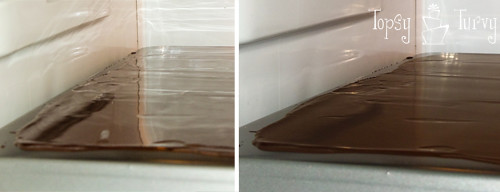
Once it’s melted I took about 1/3rd of a cup of chocolate and pour it on the back of a jelly roll pan. Then taking a metal cake spatula I spread it out evenly over the back of the pan. You can of course use anything you have in your kitchen. Just make sure it’s evenly spread.
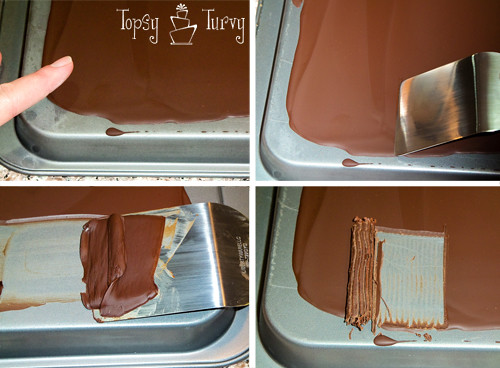
Then you need to put it in the freezer. This is the REAL trick to this whole thing. Finding the exact amount of freezer time to the the chocolate just right for curling. For me the magic number was 2 mins 40 seconds. It will go from glossy to dull, and when you stick your finger on it you won’t leave a print.
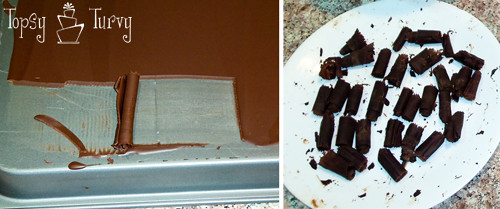
What your going to do is take a metal spatula and scrap it along the pan. If the chocolate is the right temperature it will curl!!! If the chocolate is too soft it will slide over the top of the spatula. Place the pan back in the freezer for 30 second or so. If it’s too hard it will crack as it curls. Just leave it out for a few mins. Anything you scrap off that’s not curling just add it to your melted chocolate and it will re-melt and you can reuse it! If your curling your chocolate and it get’s too soft just throw it back in the freezer for 30 seconds or so.
But when it’s the right temperature it will curl up so pretty! The first time I did it I couldn’t believe it! It worked! I could NOT believe it!!! Eeeeeek!!!! It’s so pretty! So now you just need to decide on the width and length of the curls you want. My first curls were pretty, but too thin for my cake. I wanted them fat. So I started curling from the center of the pan out in long stripes. Also instead of using the full width of the spatula I used just half of the width. So my curls were about 1/2 an inch thick and about 1 1/2 inch long! Put the curls on a plate and freeze them. Once they are completely frozen you can put them in a bag. Keep them in the freezer until your ready to use them. I ended up curling 98 oz of semi sweet chocolate for this three layer wedding cake!
Chocolate Cake Recipe
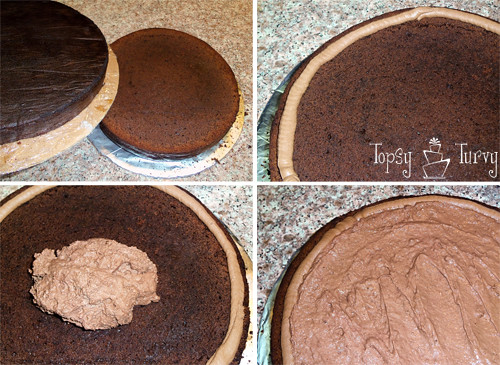
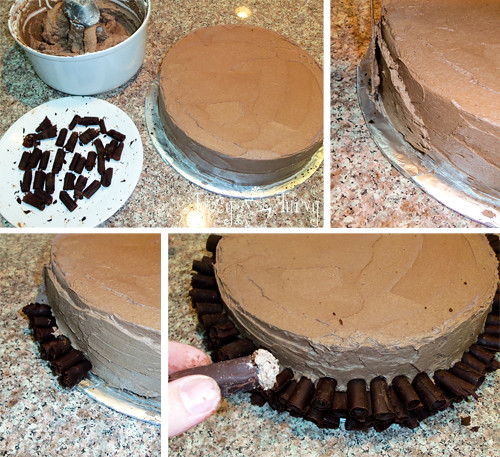
Now it’s time to prepare the cake for our curls! For this recipe I used my favorite chocolate cake recipe. Because no matter how pretty a cake is if it doesn’t taste good what was the point of all that work? I make my cake layers one super tall pan, cut the tops off and cut it in half creating 2 cake layers! I use a cake board to slide the top half off the bottom half. I made a dam with thick chocolate butter cream frosting on the bottom layer. I filled it with my Chocolate mousse recipe. Slide the top half back on the cake and frost it. Now because I’m sticking the chocolate into the sides of the cake I added more frosting to the sides to make sure it was good and thick.
Now taking a few chocolate curls out of the freezer at a time we’re going to start sticking them into the cake. I started at the base and working my way around and up! If the frosting is too thin in a spot you can add some frosting directly to the curl before sticking it into the cake. Better to have too much frosting than not enough we don’t want the curls falling off.
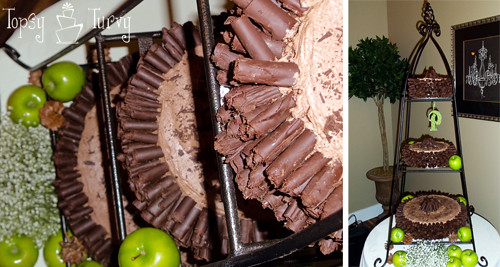
I also made a few extra large curls to decorate the tops of the cakes with. Then sprinkled some of the broken chocolate around the rest of the cake top. It turned out beautifully, and I got to learn something new (the curls). It’s always fun to do something new for my cakes. The fun thing about the curls is you can add them to cupcakes, birthday cakes, the tops of pies! I’m going to make some to keep in my freezer at all times so I can add a fun decorative elements to desserts whenever I feel like it!
I’m Ashlee, from I’m Topsy Turvy and Topsy Turvy Cakes AND (because I’m totally insane) Topsy Turvy Shop! I love to sew, crochet, knit, tile, paint, build things and I collect tools (power tools- LOVE THEM!). I love to craft, cook, bake and decorate cakes.




This looks amazing, very tasty.
Wow, that looks awesome! I wish the weddings I attend served cakes like this. 🙂
I have been trying to make these for years and have never gotten it right. I didn’t realize their was a secret to the ‘amount of time’ in the freezer…mine have always cracked, like in picture #2.
Thank you so much for explaining this so clearly.
*salivating* Looks so good. I’m always amazed at how bakers figure out how to make food into art.