

Here’s what you need to get ready before you begin:
1. Cut strips of fabric about 1 1/2 2 wide. Mine are not precise at all. You can use any fabric to make the flowers. I used “silky” fabric for this headband.
2. I ordered the 5mm metal headband from here but you could choose another size if you’d like.
3. The ribbon that fits well on the 5mm headband is the 3/8″ and I used grosgrain ribbon.
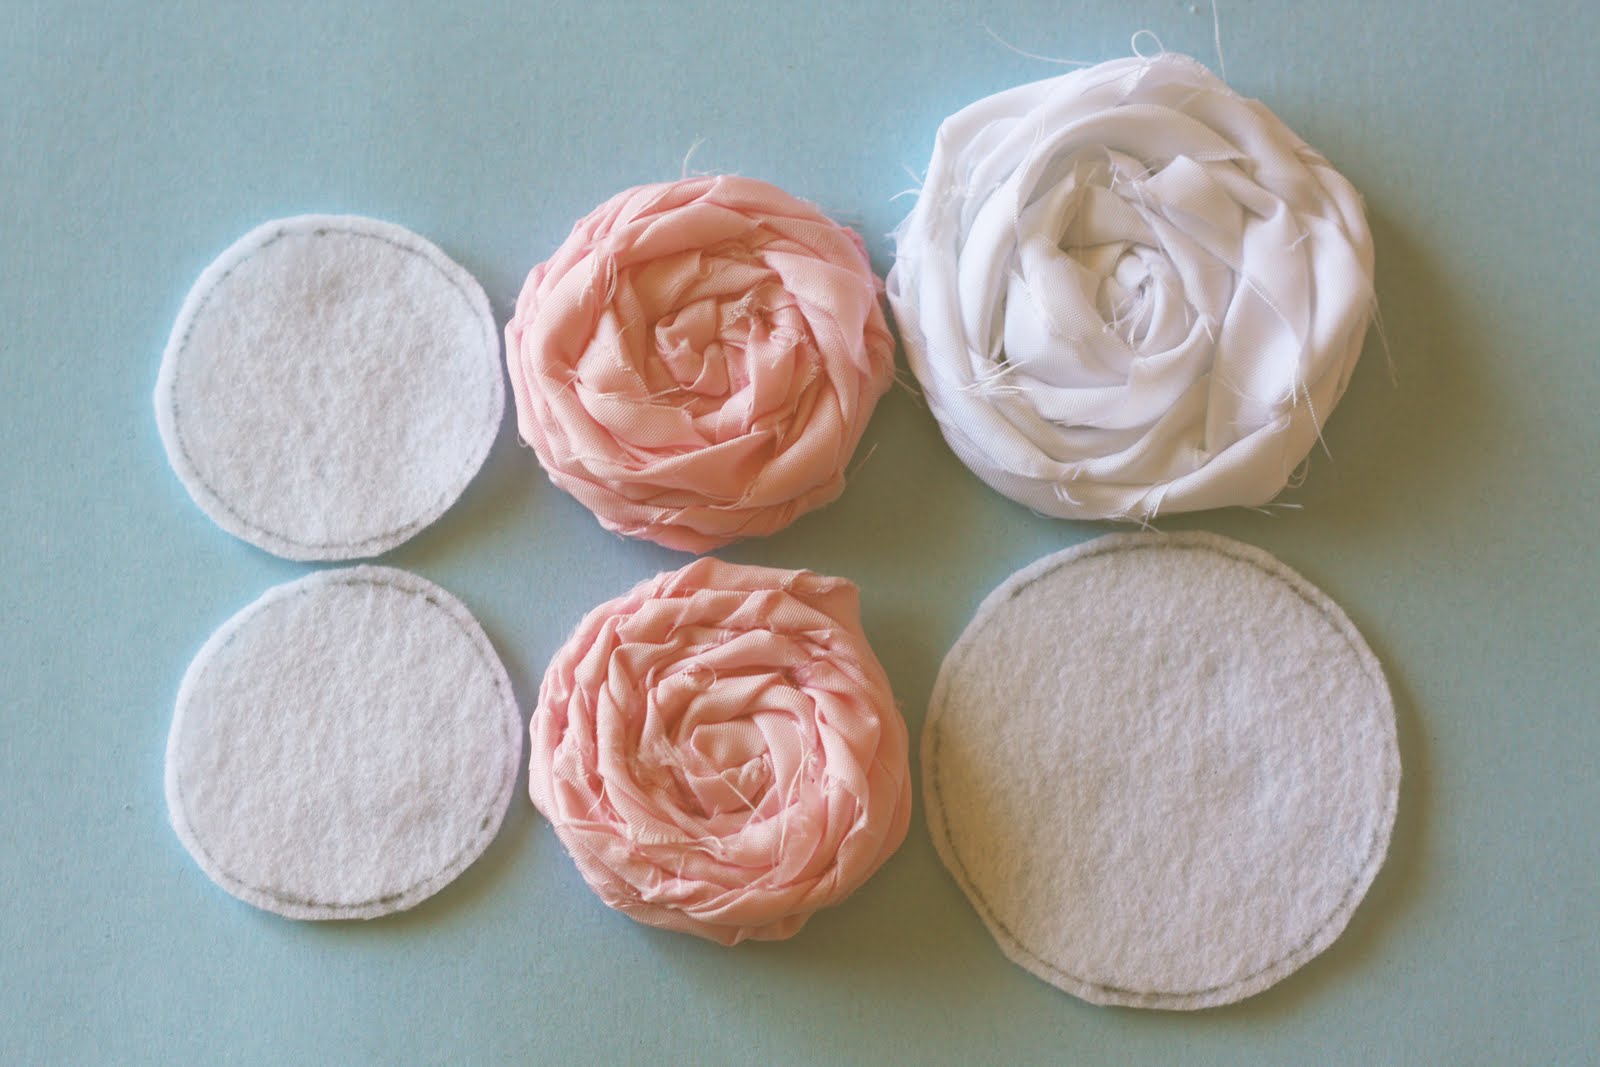
4. Trace circles onto the felt in the size that you want your flowers to be. I used objects from around the house. Then cut out the circles. You’ll need 2 circles for each flower you will be making (the first circle for gluing the fabric on to make the flowers and the second to glue on the underside of your flowers).
Alright, let’s get started…


Tie a knot in one end of your fabric and then glue the knot to the middle of the felt circle

Begin wrapping your fabric around the knot and twist the fabric continually as you go

Every so often glue the fabric to the felt. I’ve seen flowers made both tight and loose. These made here are more loose. It’s just what you like the looks of. I made a couple of flowers before I got the hang of it and to find out how tight or loose I wanted to wrap the fabric. Just keep experimenting.

When you either run out of fabric or you’ve covered the felt circle completely then glue the fabric to the back of the felt. Trim any extra fabric, if necessary.

This is the back of the finished flower

Here’s a pretty finished flower

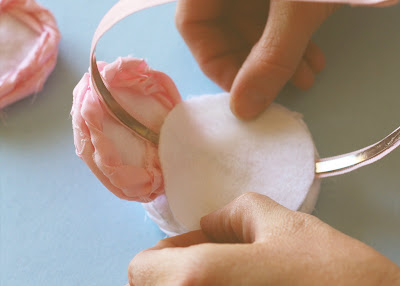
Decide where you want the flowers to be positioned on the headband and then glue them on

 After the flowers are glued on the top of the headband then glue the second set of felt circles on the underside of each flower


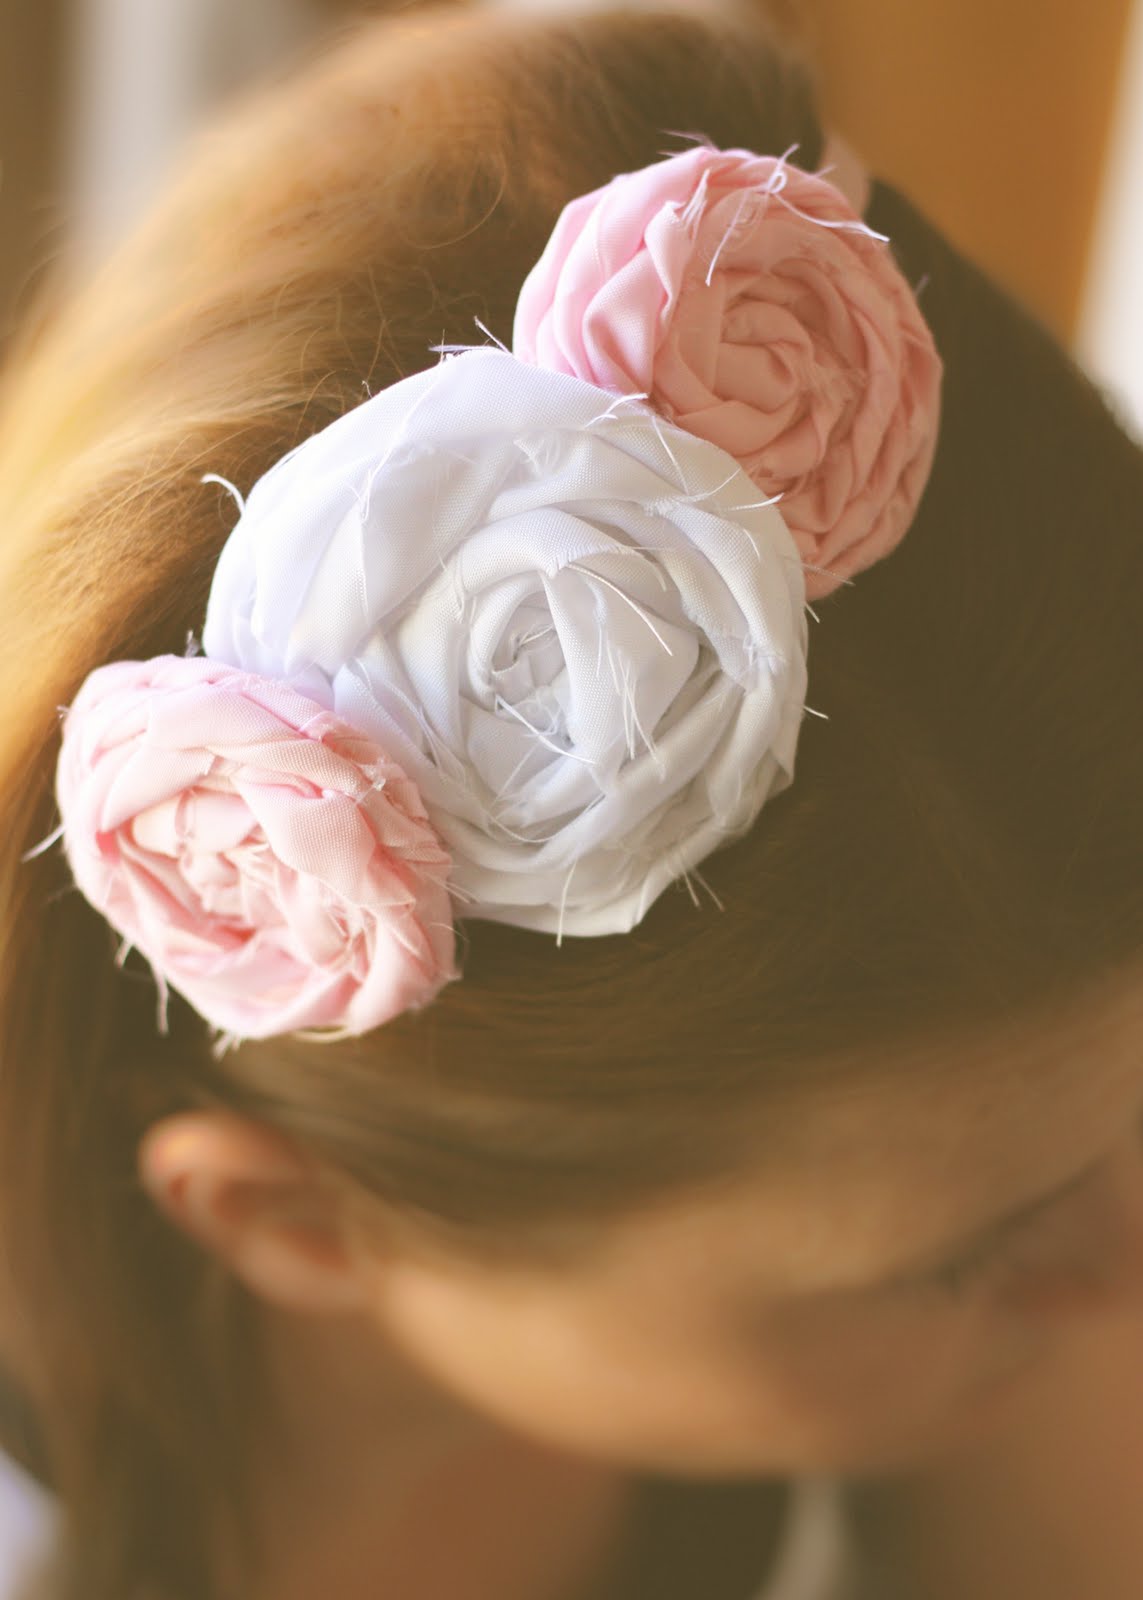
The results…

Those are absolutely gorgeous. I’ve been looking for something like that, now I’m going to make one!
This is so cute. Now, I have a question: do you have any ideas of how this could be wrapped to be mailed, especially if the flowers are big. I have been trying to figure out a way that it would not squish the flowers, but I can’t figure it out. Any ideas?
woooow really nice and easy , thank you so much 🙂
Now that’s a fun and easy activity. Just what I was looking for. Thanks as always!!
that is adorable! and something i can do lol 🙂