Today I will be teaching you how to make a simple Christmas card using Photoshop Elements. It’s part of Tip Junkie’s Top 10 Holiday Trends series going on this month. I’ve included several screen shots of Photoshop Elements in this pictured tutorial so you can easily follow along and see for yourself how the Christmas card is made.
 Hi there! My name is Amanda and I am perfectly thrilled to be guest posting at Tip Junkie! My home on the Internet is Everyday Elements, where I talk about all things photography and Photoshop Elements.
I offer a variety of affordable online workshops for photography and editing, as well as free and for-purchase actions.
Photoshop Elements
For all the Photoshop users out there (CS5 and earlier), the same steps can be followed in Photoshop, except you will use the “mini-bridge”. There are Three ways to create cards in Photoshop Elements:
- Use the ‘Create’ option built into Photoshop Elements and use a template they have premade for you.
- Use a purchased card template and insert your picture into the card, using clipping masks and personalize the text.
- Use digital papers, textures, various elements to create your own.
The tutorial that follows shows how to make a card using option #3.
It really is very simple to make a card in PSE, however, making a lovely card is not so simple. I am lacking in the creativity department, so personally I usually use a purchased template and just insert my pictures. However, there are many talented, crafty people out there who do have the creativity to do it, so I’m going to give you the how-to part and you can get busy creating.
Warning: A million screen prints to follow! 🙂 And, let me stress the resulting card is very basic. I kept it simple so as to not cause tears for beginners. I provide a more complicated template in the freebie download (at the bottom).
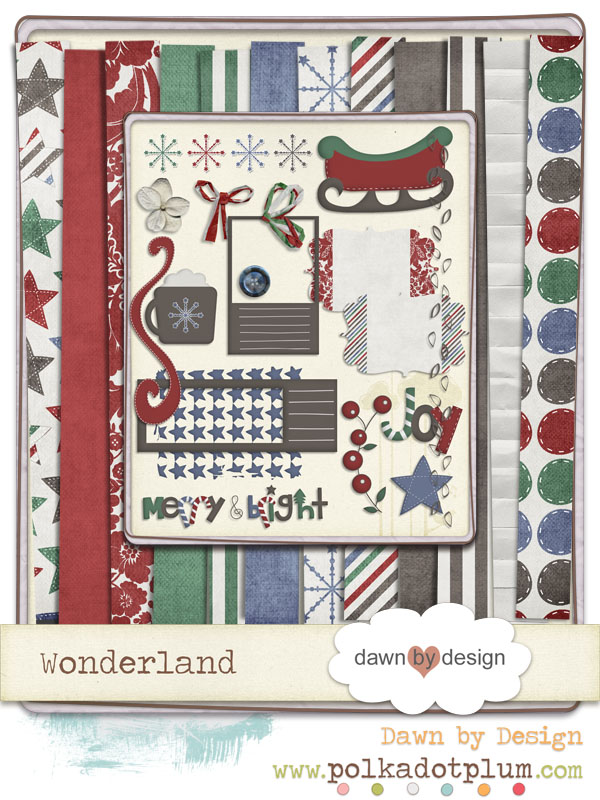
Note: Remember I said I am not very creative, so I am using a digital Christmas scrapbook kit from my friend Dawn Farias.
Step 1: Open a new file in PSE, set the measurements to whatever you want to send out, what envelopes you have. I am using an image that is portrait orientation (vertical), so set mine to 5×7, 300 dpi.

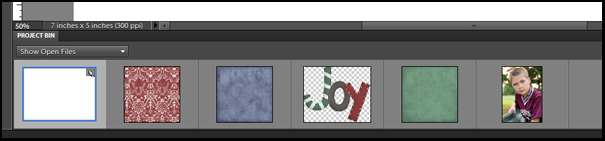
Step 2: Open up the digital papers and other elements you want to use in your card. You will be able to see them in your Project Bin.
Step 3: Use the rectangle shape tool to create a large shape where you would like your picture to go. The black area (in example below) is where you picture will be seen.

Step 4: Drag the paper you would like to use from the project bin onto the card file. Activate the move tool (hit ‘v’ on your keyboard) and resize the paper to fit your document a little better. It does not have to fit it perfectly.
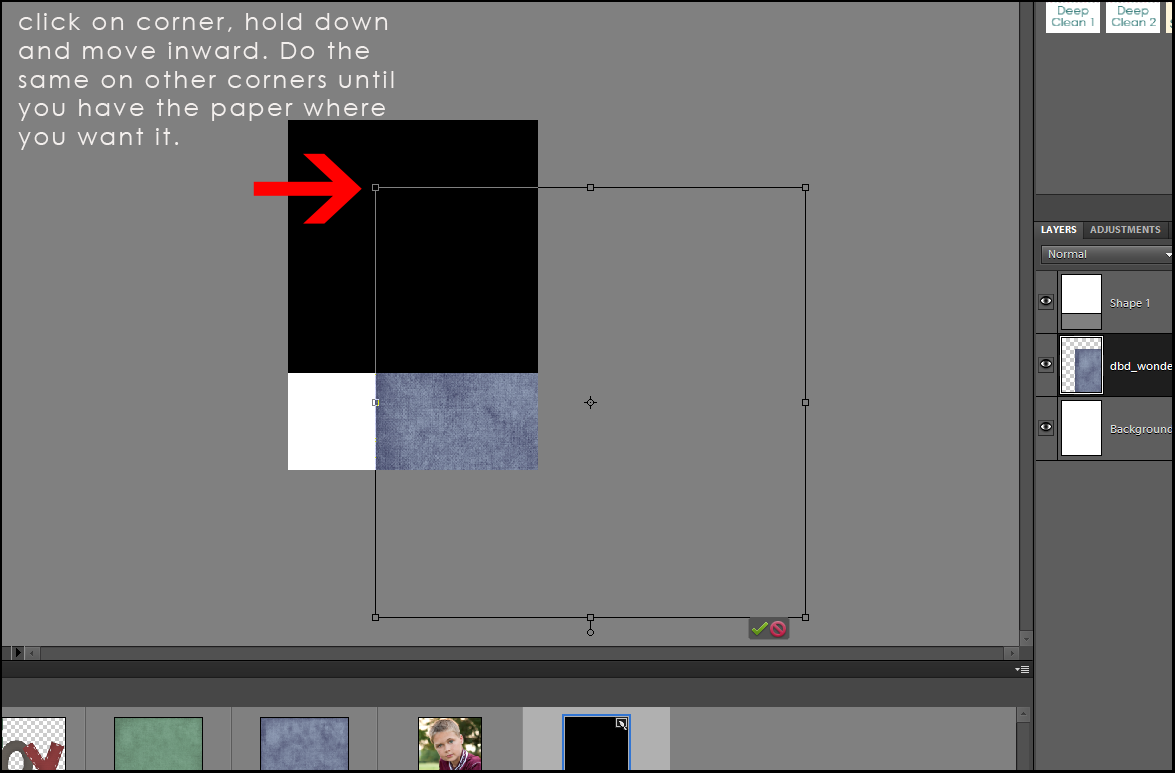
Step 5: Make another rectangular shape on your document, where you want color or another digital paper to be seen.

Drag the paper you want to go there up from the project bin. Use the move tool to resize it.

This is how the layers will look in your Layers palette.

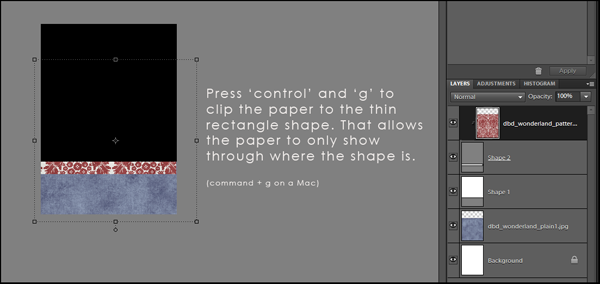
Step 6: Now comes the “clipping” part. When you are on your paper (or picture) that you want to “clip” to the shape below it, press ‘control’ and ‘g.’ This will make the layer indent a bit and the paper (or picture) will only be seen where the shape is.
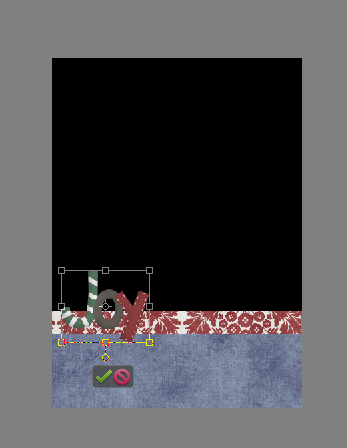
Step 7: Pull in (from the project bin) any other decorative elements you want to add.
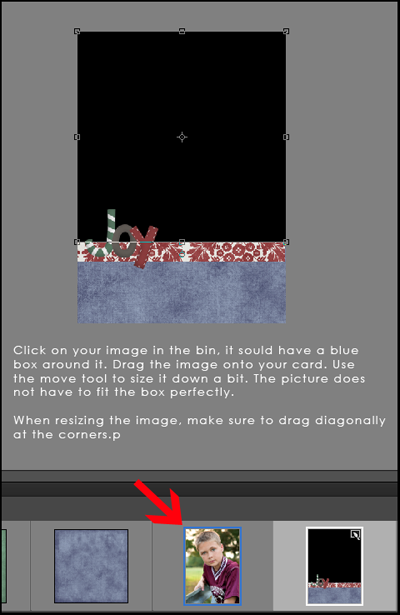
Step 8: Now we are going to pull in our picture. It is in our Project Bin, along with the digital paper and other elements. Simply drag the image from the Project Bin onto your card. Make sure you are on the layer with the clipping mask for the picture. If you make a mistake and drag in on top of another layer, simply click and drag the layers until they are in the right order.

Remember to use the move tool (v) to resize your image. It does not have to fit the box perfectly.
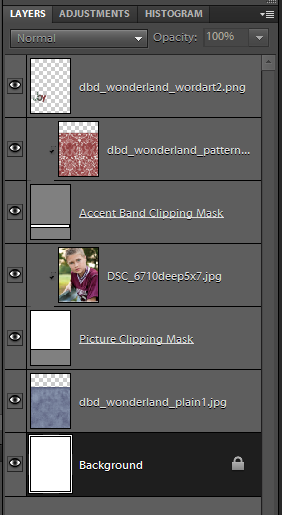
This is what your layers will look like now:
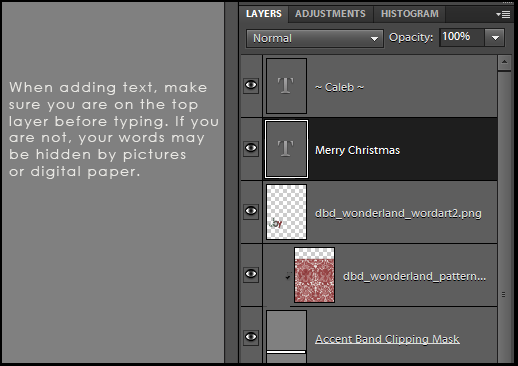
Step 9: Time for the Christmas greeting. Click on the top layer in your Layers Palette and then activate the Type tool (hit ‘t’ on your keyboard). Using whatever font you choose, type your Christmas wishes.
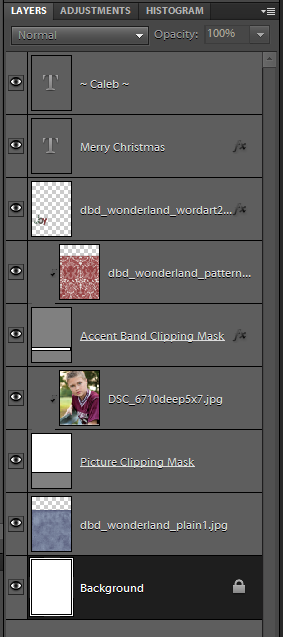
I added a few layer styles, like drop shadows and strokes (the layers that have them have ‘fx’ on the right side of the layer). This adds some dimension to your elements. To add layer styles, go to your Effects palette and click on the icon that looks like two rectangles set apart. Then click on the drop down menu and choose what style you would like to add.
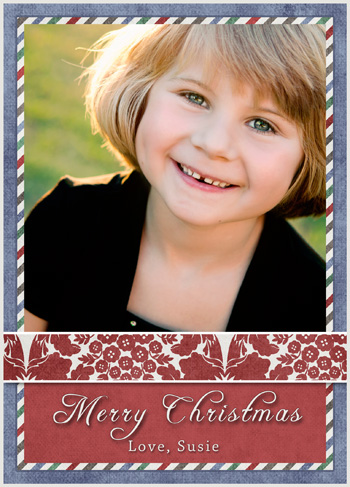
Below is the resulting Christmas card:

Step 10: To save your image as a JPG and sent to print, you need to flatten the layers (right click on any layer and choose ‘flatten’). Save as a JPG with a quality of 10.
And, to go one step further, you can watch a short video tutorial of me doing all of the above steps by clicking HERE.
Below is another card I made with four of the papers from the kit (template inspired by one at Shutterfly). It is a big more complicated because of additional layers. You can keep the layer/shape colors or insert papers or textures to add more dimension.
If you like the simple cards I created and would like to build on their foundations, you can download the templates by clicking HERE. They are PSD files, meaning they only work in Photoshop or Photoshop Elements. You go to File, Open and click on a template and the layers will open up, and you simply drag in your paper and pictures and “clip” them to the masks.
If you would like to learn more about making cards in Photoshop Elements, I do teach an online workshop for beginners to learn how to make collages and cards, using clipping masks, layer styles and other elements. The next one is December 9th and there are a few spots left if you would like to attend. Go to Everyday Elements to read more about the workshop, what is included and how to register.
Dawn, my friend who made the kit I used for this card, is offering Tip Junkie readers a extra special discount. You can get the Wonderland kit (12 digital papers and tons of elements) for just $1 by using the code ‘TIPJUNKIE’ at checkout.
If you are like me and prefer option #2, buying a premade template and inserting your picture, some vendors I prefer are Pretty Presets, Photo Card Boutique and Fototale Designs.

Copy & Paste the Code into your Blog
<a href="/category/christmas/" target="_blank"><img src="https://i212.photobucket.com/albums/cc10/TipJunkie/Top10holday_button_button.gif" alt="Homemade Christmas Ideas" border="0"/></a>

You’re ever so welcome, Cheryl! Can’t wait to see what kind of cards you create when you have a moment to play.
You are very welcome! Thank you for taking a moment to comment. 🙂
Thank you, Angie! I tried to keep it very simple for those new to PSE. I kept making cards that were more elaborate and had to keep pulling myself back. LOL
You are most welcome, Laurie! Thank YOU so much for the opportunity!
PSE (and PS) is addictive!! Come on over! 😉