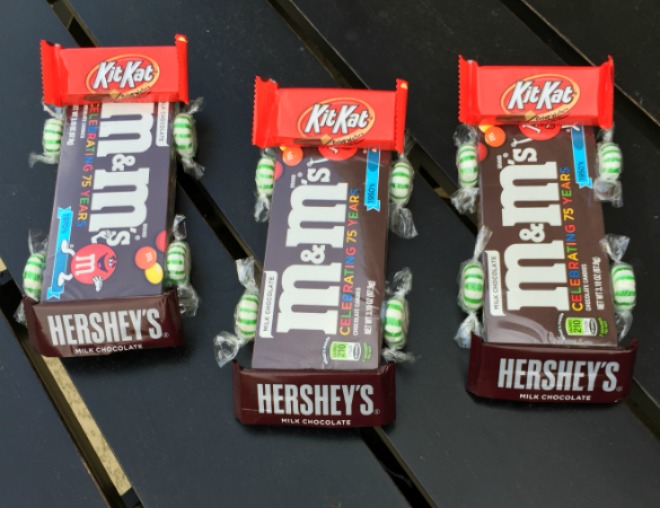
How to make a candy car is not only fun to look at, they are fun to eat, too. They make the perfect homemade gifts for a Pinewood Derby or race car themed birthday party for kids. They aren’t super inexpensive to make since you do have to buy all the candy plus a few extra supplies, but I think that the bright colors and fun themed gift make the expense worth it. Besides, this party favor is edible!
If you’re still in the planning process for your Pinewood Derby then be sure to check out my printable organization planner, DIY Decorations, and fun Pinewood Derby Party Games for kids of all ages. They are all in this adorable Pinewood Derby party theme and were crazy fun to make.
DIY Candy Car
Materials for 1 Candy Car:
1 Boxed Candy
4 green Spearmint hard candy {round}
1 Cinnamon hard candy {round}
1 mini Hershey’s bar
1 mini Kit Kat bar
1 Hershey’s Kiss
1 small sixlet
Hot Glue gun {or any adhesive you prefer}
Craft inspired by: My Pink Stamper
Boxed Candy Tip:
The ideal width should be the size of the mini Hershey’s and mini Kit Kat candy bar. If the box is wider than the chocolate bars then the cars’ proportions will be off. I used milk duds and M&M’s boxed candy.
Hershey’s Candy Tip:
The other ideas I saw online used 2 cinnamon hard candies. One under the Hershey’s in front and another one under the Kit Kat in back. However, I couldn’t get the red cinnamon candy to work in the front under the Hershey’s. I think it’s because the boxes where short. To solve this issue, I used a white sixlet instead. It was the perfect size to prop up the Hershey’s at an angle.
Assembly Tip:
It really doesn’t matter, but I wanted all the candy wrappers to be ‘readable’ so it’s a good idea when you are gluing it together to make sure nothing is upside down. HA!
Step 1:
Figure out the position and then hot glue the white sixlet to the Hershey’s bar accordingly. Tip: Make sure the Hershey’s candy is right side up so you can read the label.
Step 2:
Add hot glue to the back side of the hershey’s {and other side from the sixlet} as well as on the top of the sixlet. Attach to the front of the boxed candy. Make sure the glue on sixlet and hershey’s attaches to the box securely.
Step 3:
Figure out the position and then hot glue the red cinnamon candy to the back of the candy box. Yes, the red candy looks like a cool light in the back, but it’s true purpose is to keep the Kit Kat propped up at an angle. So when you add the hot glue to the red candy it will be near the bottom. This way the candy is positioned above the box where the Kit Kat can lay on top of it.
Step 4:
Add hot glue to the back side of the Kit Kat on the top and middle {where the red candy will sit}. Attach to the back of the boxed candy {on the top}. Make sure the glue on the Kit Kat attaches to the box and red candy securely. Tip: Make sure the Kit Kat candy is right side up so you can read the label.
Step 5:
Figure out the position and then hot glue the 4 green spearmint candies to the sides of the box. Two on each side. Tip: Make sure the candies are parallel to each other just like car tires are. {wink}
Step 6:
Figure out the position and then hot glue the hershey’s kiss to the top of the candy box, near the back. {optional}


Leave a Reply