How to make a Christmas Advent Calendar with your Silhouette is easier than you might think! Here is fun tutorial to get you cutting with your Silhouette. Best of all? Its a great Christmas craft that your family will love and will look great in your house. After Christmas is over you can use the frame as a monthly calendar or for displaying memorabilia.
How to Make a Christmas Advent Calendar {Silhouette}
| Difficulty | Cost | Time | Age | Person | Event |
|---|---|---|---|---|---|
|
Easy
|
$25 to $50
|
4 Hours
|
25-50
50+ |
Grandmother
Grown Up Best Friend Mother Woman |
Tradition
|
Inspired From:
You Will Need...
- Silhouette Machine
- Silhouette Limited Edition Calendar Kit
- Scrapbook Paper
- Tape
Step by Step Instructions
Step 1
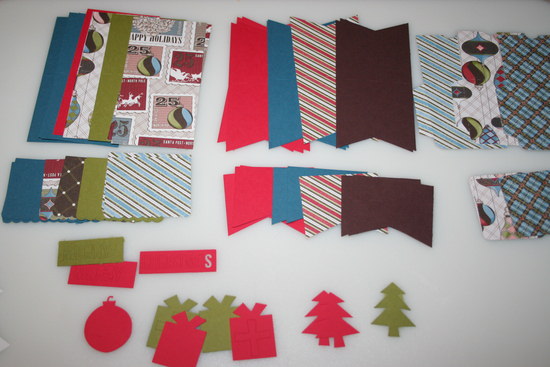
Log in to your Silhouette account. Redeem the promotional code offer from the advent kit to download the shapes. Once the shapes have downloaded you can choose what shapes you want to use. I chose the pocket, banner pocket and scalloped pocket. Cut approximately 9 scalloped pockets, 9 pockets and 9 banner pockets in coordinating solid and patterned scrapbook paper or card stock.

Step 2
For embellishments I cut the banners, ornaments, Merry Christmas, presents and tree in coordinating solid card stock.

Step 3
Once all of your shapes have been cut with the Silhouette you can begin assembling them. Mix and match your paper for a whimsical pocket.
Step 4
Add adhesive along the edges of the pocket.

Step 5
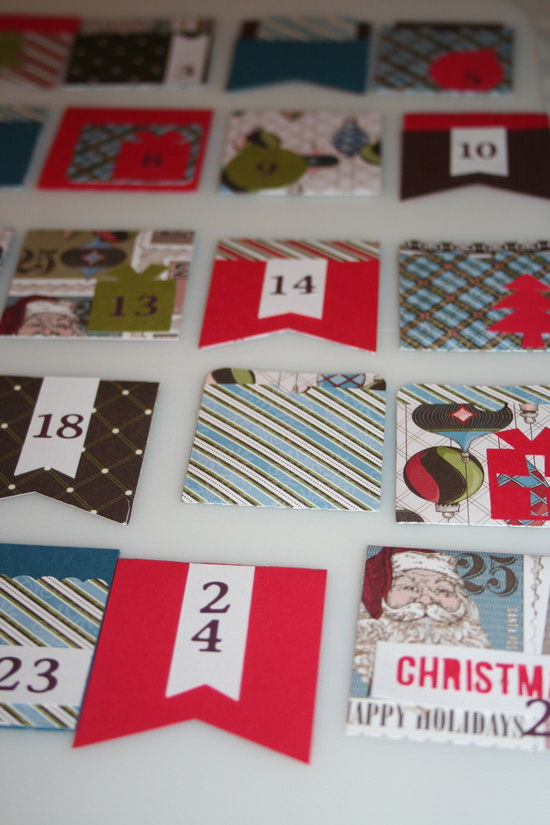
Use tweezers for easier placement of numbers. You can either cut the numbers from your Silhouette or use sticker numbers.

Step 6
Lay out your finished pockets in rows of 5 until you have the desired pattern.
Step 7
Begin attaching the pockets to the clips.

Step 8
Hang on the wall. Make sure it’s displayed for everyone to see. Step back and admire your work!

Gallery


Leave a Reply