Are you looking for an easy pillow sham pattern to recover a pillow or two for the holiday season? You are going to love this easy way on how to make a pillow sham or pillow cover! It’s a quick and free sewing pattern that can be tailored to fit any size pillow.
Learn How To Sew on Tip Junkie and give yourself the confidence you need to learn how to use your machine and make beautiful things!
How To Make A Pillow Sham
Easy Envelope Closure ~ Pillow Tutorial
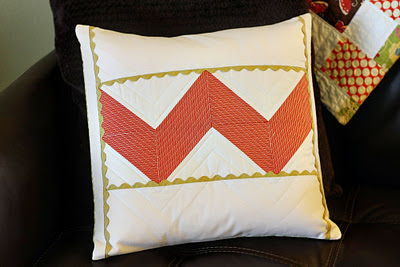
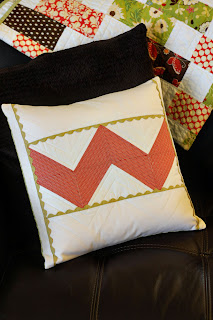
This basic tutorial walks you through just how quick and EASY it is to create your own accent pillows for your home. I’ve shown a more complex front using some piecing and quilting, but this is optional. Also, you can adjust the pattern to fit any size pillow you have … I’ll explain how at the end of the tutorial.
Finished Size: Approx. 16″x16″
Materials Needed to Make a Pillow Sham:
(1) Front Piece 16″x16″ {I’ve shown a quilted version, but you can just do a plain piece of fabric too}
(1) Backing Piece 12″xWOF {width of fabric} OR {12″x16″ and 8″x16″}
(1) Batting & Scrap Piece 17″x17″ {if creating a pieced & quilted front}
(1) 16″x16″ Pillow Form
Coordinating thread {I used neutral for everything except my quilting which was white Sulky thread}
Make Pillow Cover
1. Create your front piece. If you are creating a most basic pillow, all you need is a 16″x16″ piece of fabric.
**Quilted front tutorial was created following this tutorial for my ‘Zig Zag Ricky-Rac table runner.’ I created two zig zag ‘blocks’ and then added a 5″ strip to the top and bottom {adding ric-rac as I sewed the seams} and then a 3″ strip to the sides {again adding ric-rac as I sewed the seam}. I then made a quilt sandwich:: scrap bottom piece {this will be on the inside of the pillow and not seen} right side down, batting, pieced pillow front right side up. I quilted it very similar to the table runner following the zig zag pattern.**
2. Cut backing piece {if not already done} to two pieces, 12″x16″ and 8″x16″. Finish one of the 16″ edges {I used my serger, but you could also do a zig-zag stitch} on each piece to prevent fraying. Then measure 1/2″ in from this finished edge and fold fabric, WS {wrong sides} together. Top stitch folded edge {I did a double stitch on mine}. Repeat for other piece of fabric.
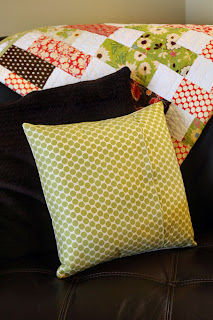
3. Layer your pieces as follows:: Front piece, right side up; 12″x16″ back piece, right side down with finished edge on the inside; 8″x16″ piece, right side down with finished edge on the inside {this piece will overlap the 12″ piece by a couple of inches}.
4. Pin pieces together, especially where they overlap. Stitch around the entire perimeter using a 3/8″ seam allowance. Back stitch the two sections where the back pieces overlap. I like to finish my edges by serging them to create a clean finish {you could zig-zag or skip this step}.
5. Turn pillow right side out, using the opening in the back and GENTLY push out corners. They will be slightly rounded which I think looks fine for a pillow. However, if you want very pointy corners, you should trim the excess fabric from your corners {on the inside before you turn it right side out}.
6. Stuff your pillowcase with your pillow form and admire your work!
Pillows add such a fun splash of color and personality to a room. If you’re intimidate by quilting the front, try adding trim {ric rac around the edges or a ruffle down the middle} or using a neutral base fabric and painting a cute silhouette or phrase for the current season.
How to Adjust for different size pillows?
I like to cut my front and back pieces based on the size of the pillow {mine was 16″x16″}. I don’t add in a seam allowance as I like my pillow covers to fit snug. If you want a looser fit, you’ll need to add an 1″ to each pillow form measurement for your cut piece {I would have needed to make mine 17″x17:}. For the back pieces, you’ll just make one piece about 3/4 the width of your pillow form {mine was 12″ x 16″} and then make the other piece about 3-4″ less in width than your first piece {mine was 8″ x 16″}.**
How to Sew Series:
- Step 1: How To Thread a Sewing Machine {step-by-step}
- Step 2: The Needle and Thread Guide {all you need to know}
- Step 3: How To Use A Sewing Machine {fabric mug rug}
- Step 4: How To Make A Pillow Sham or Cover {sewing pattern}
- Step 5: How to Sew A Basic Quilt Tutorial
I’m Andrea of Knitty Bitties my little shop that fills my heart as I sew my days away in a wonderful room creating little bits of happy for you. You can read more about my days, my love of iced tea, running, baking & my newest love, our puppy, Daisy girl.
P.S. Join the conversations over on the Tip Junkie Facebook page. It’s a great place to ask questions on how to make things or for specific tutorials you need.
 |
Promoting creative women through their tutorials,
craft rooms, and products. .
~ Laurie {a.k.a. the Tip Junkie}
|


I just made two pillows following your tutorial. Thank you so much for the easy directions! They look great!
Could not find a way to print Pleae e-mail me
instructions to make a pillow sham – you used a
16 x16. Thank you
Wow, these look really nice once finished! I will keep these instructions handy next time I find myself with a stained or ripped pillow! Great idea.